Practical guide · Capture and preparation
Before You Import Hundreds of Photos: A Practical Preparation Checklist
After photographing a pavilion, you may have hundreds of files. Before importing them into MakeWorlds Studio, separate the original backup, selected input and files held aside. A defined input set gives you somewhere concrete to return when reviewing the reconstruction: which photos were supplied, and which areas still need capture. Work through file organization, image review and coverage checks below.
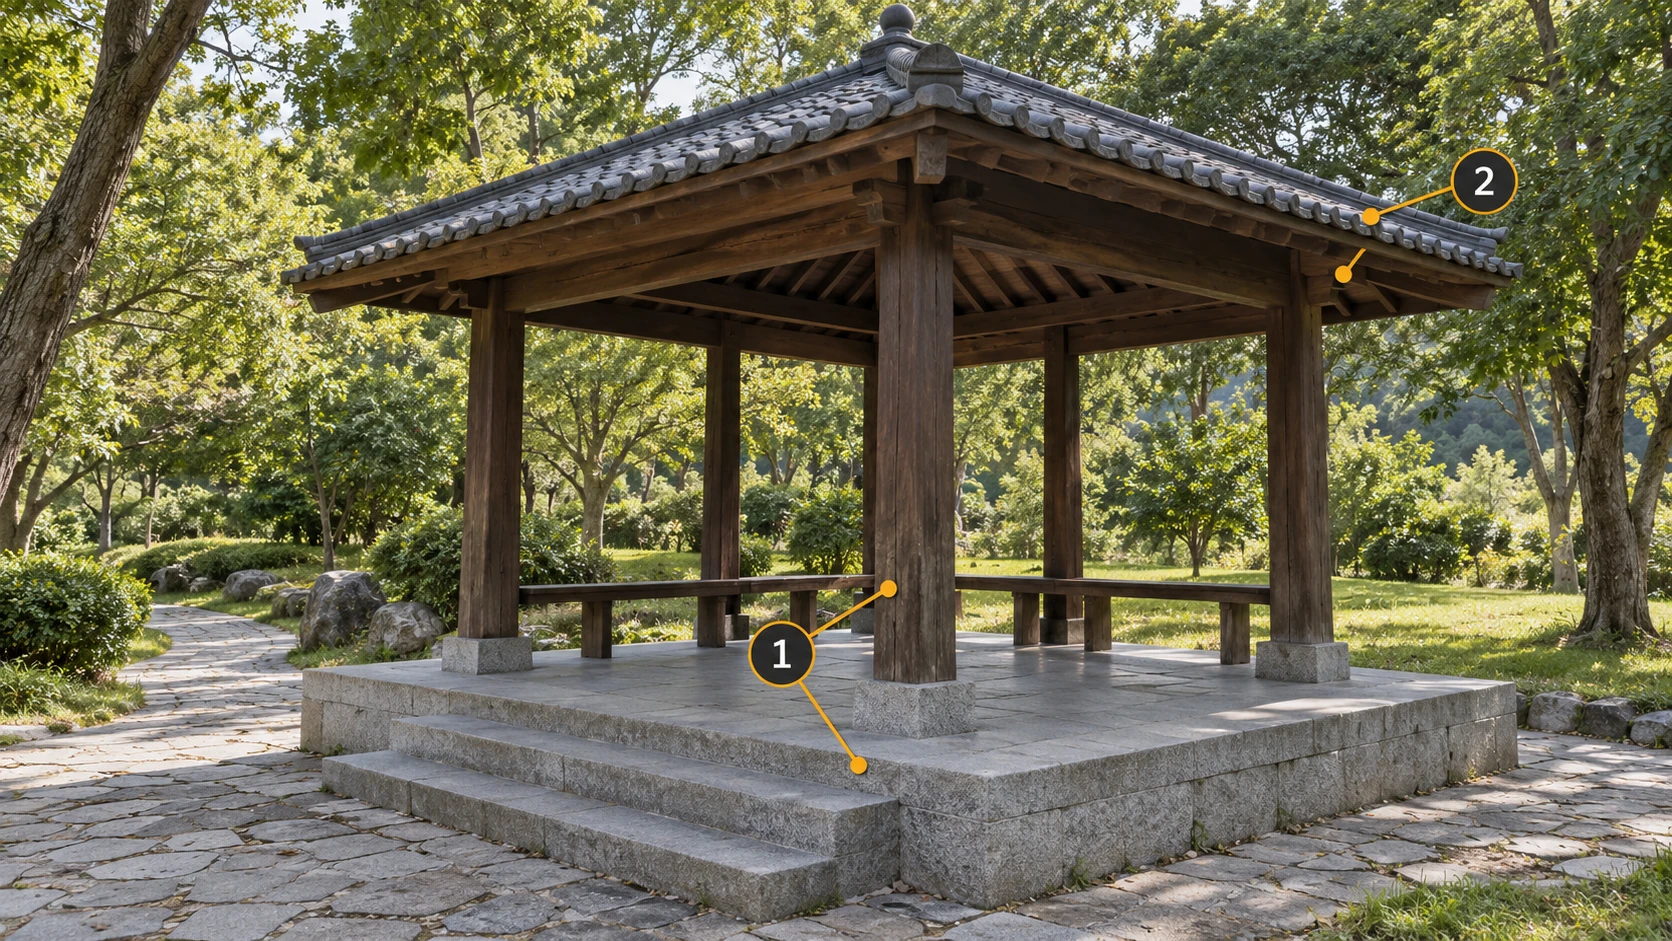
Define the reconstruction extent first: the pavilion, its steps and a short stretch of path, for example. Judge each photo against that task. A frame dominated by distant trees may still include a pillar that connects two useful viewpoints.
Preserve originals and make a reversible working set
Verify the copied files before reviewing.
Copy the original material to a backup folder, compare file counts and open samples from the beginning, middle and end. Resolve damaged or missing files against the source media before making selections.
Create a separate copy for this task.
Copy candidate photos into the working input. Move rejected files to a separate sibling folder so they can be restored. Keep held files outside the input tree to avoid tools importing them recursively.
Preserve filenames and capture metadata.
Retain camera filenames, capture times and metadata. Keep same-named files from different devices in separate batches to avoid overwriting them, and check how the importer handles subfolders. Avoid resizing, cropping or retouching during organization.
photo-project/
├── originals/
├── input/
└── hold/
Keep originals as the backup, input as the selected processing set and hold as the files set aside. Import input, not the parent photo-project folder. Folder names can vary, but keep these roles separate.
Separate scenes and capture sessions
Group by reconstruction target first.
Separate unrelated sculptures or buildings captured on the same day. Retain surrounding paths and context that connect pavilion views, but keep unrelated locations out. Record whether each set covers the front, sides or a full circuit.
Review separate sessions before combining them.
Review different times, devices and return visits separately. Confirm that objects and structure still correspond. When a second batch supplies a missing view, select and document the needed files rather than merging every batch without review.
Scan the thumbnails, then inspect suspect frames
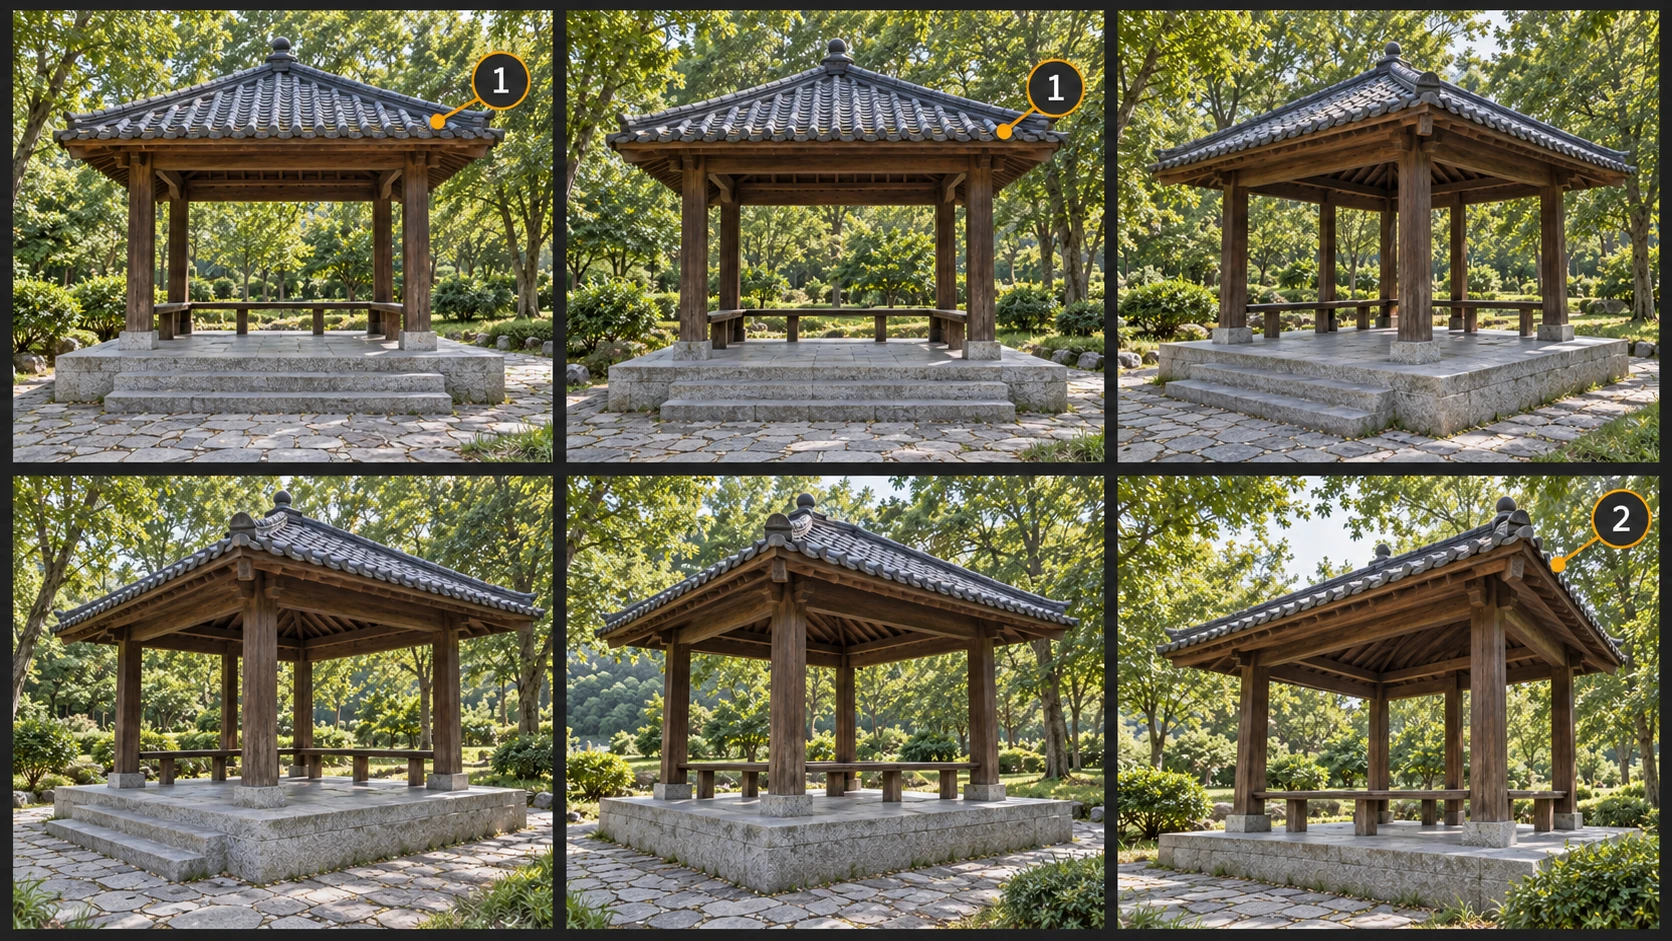
Review in capture order, not by file size alone.
Follow the sequence to understand the route. Separate unrelated photos and flag bursts from the same spot without deleting them immediately. File size and resolution do not replace an inspection of the actual image.
Distinguish repeated frames from nearby viewpoints.
Compare the pillars against the background, the visible step edges and the eaves. Similar-looking photos may reveal different surfaces when the camera moves. For a burst from one fixed position, favor clear frames with less obstruction.
Inspect blur, exposure problems and obstructions
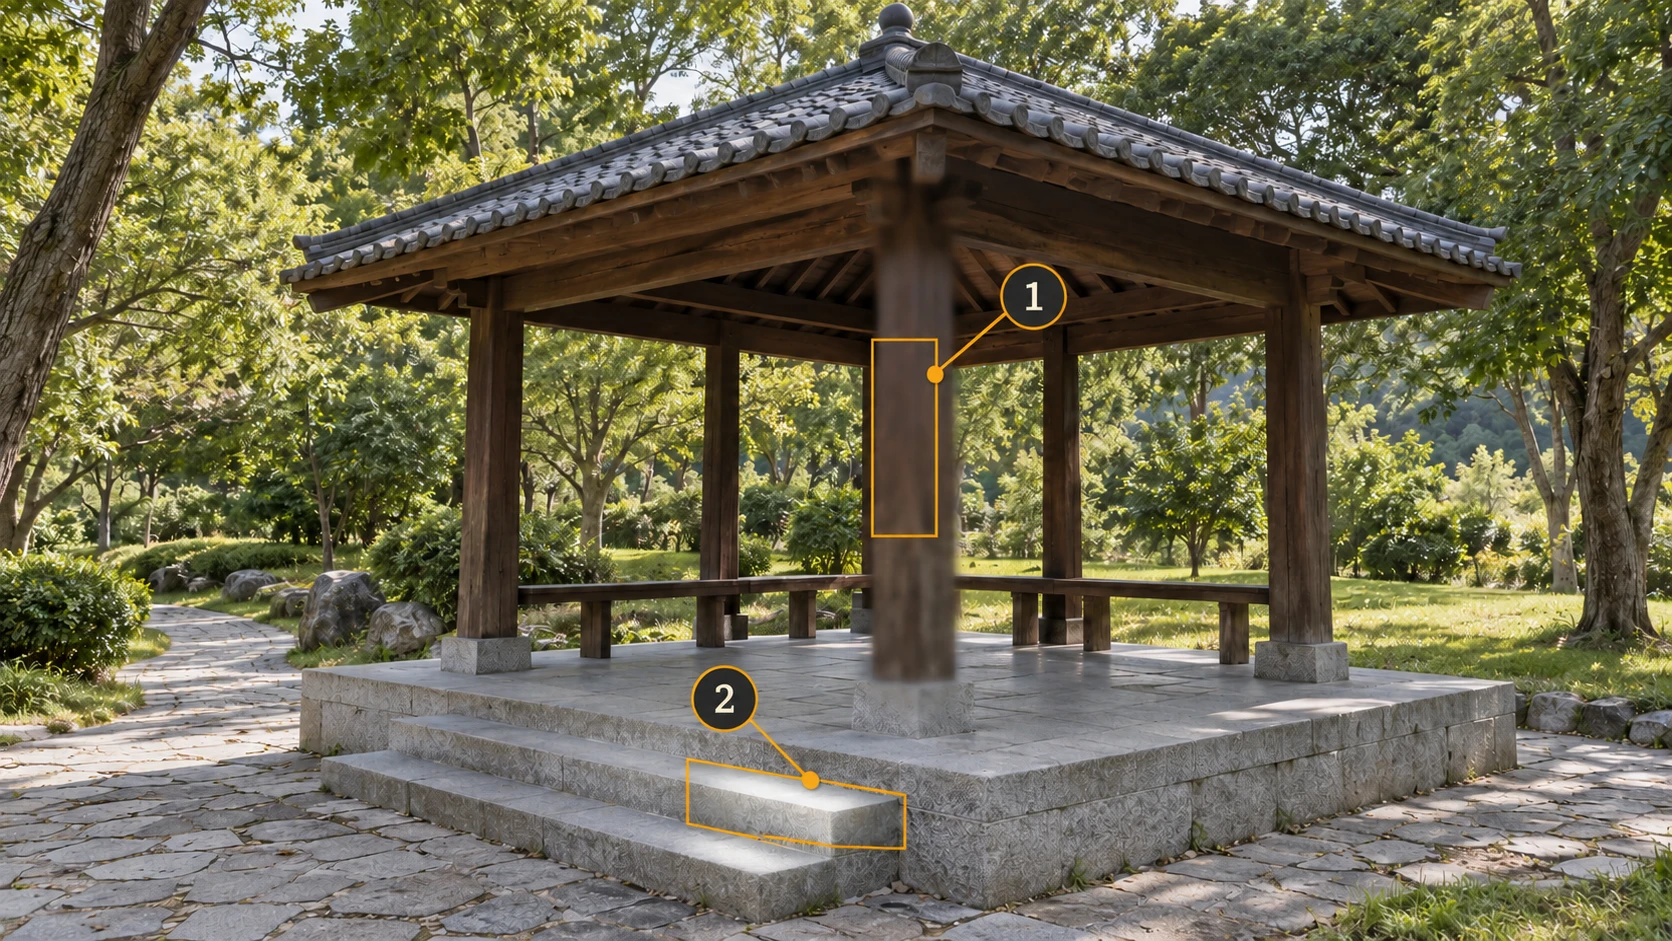
Inspect the target at the image’s original size.
Inspect a pillar edge, wood grain or a paving joint at full size. Look for missed focus, motion blur or lost detail from compression. Set clearly affected frames aside rather than accepting them because the thumbnail looks sharp.
Inspect both bright and shaded areas.
Check for textureless highlights on the steps and unreadable shadows under the roof. Compare neighboring photos to see whether they provide a usable view. Review coverage before rejecting every bright or dark frame.
Identify temporary obstructions.
Look for a passing person, a finger over the lens or a close branch hiding the subject. Prefer unobstructed views without cropping the originals for appearance. If every view is blocked, mark the location for recapture.
After selection, follow the route through the remaining photos
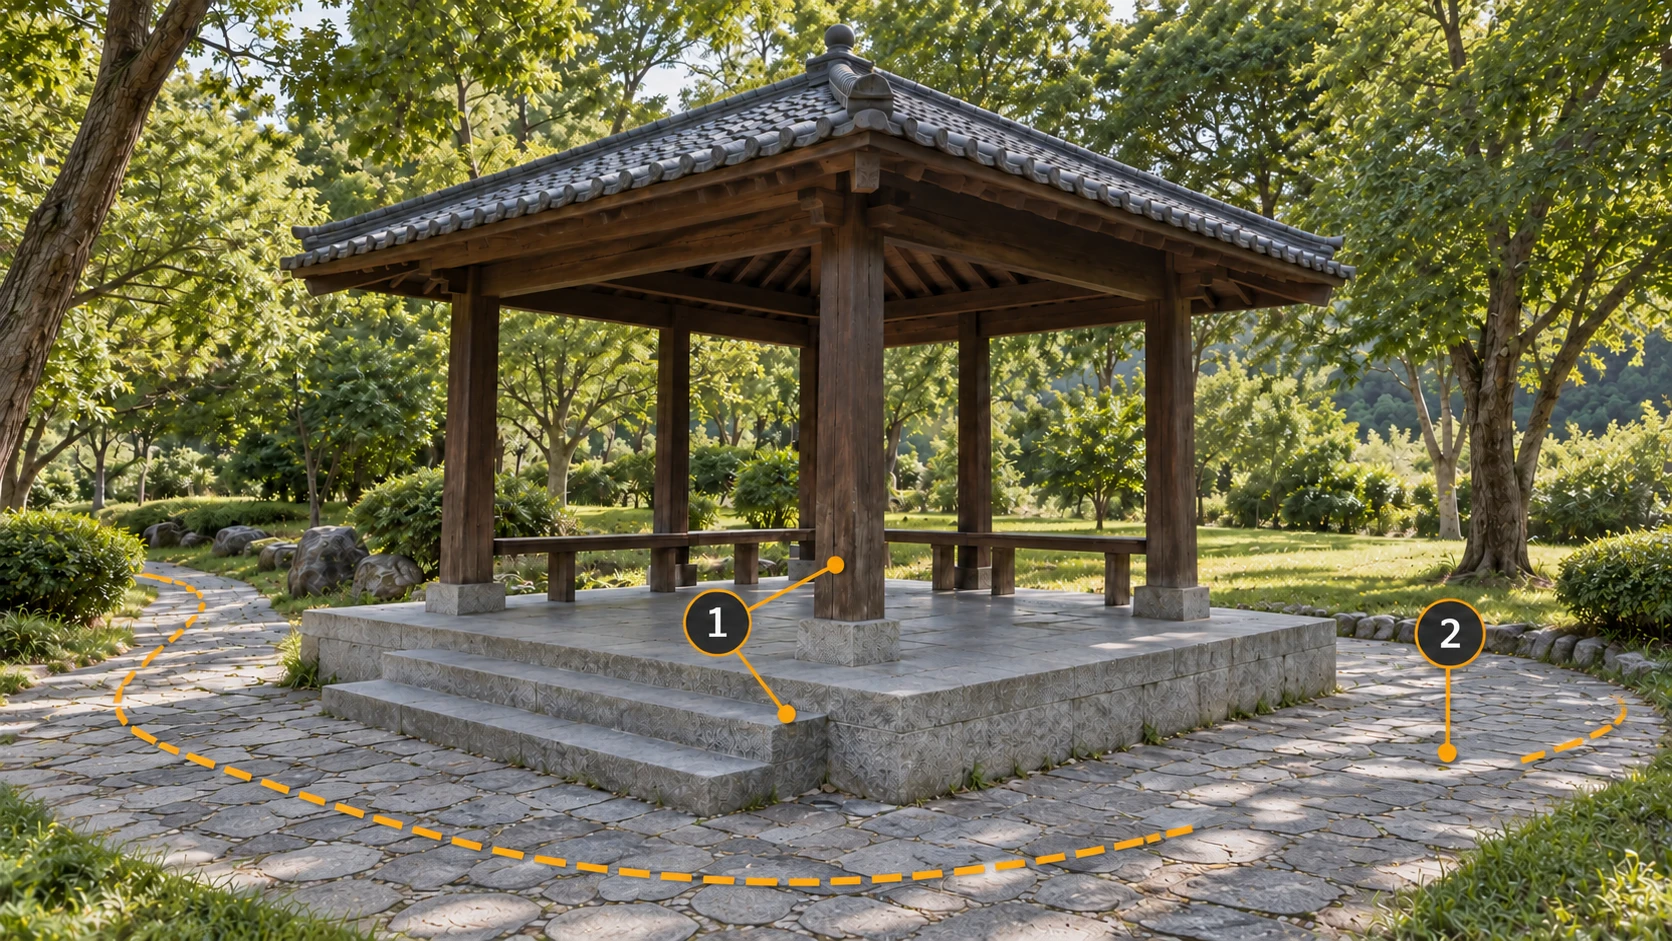
Check the connection between neighboring views.
Track a pillar, step corner or roof edge through the selected sequence. If it jumps from front to back without shared content, check the held files for a usable connecting view. Recapture the interval if none is available.
Review sides, rear views and the roof underside.
Front views often outnumber side and rear views. Check each part of the intended extent for clear observations. Do not keep deleting merely to reach a target count, or restore unrelated frames just to increase it.
Keep only the selected input in the processing folder. Record its count, selection decisions and remaining capture gaps so later runs can be compared against a known set.
Final checks before import
- The original backup is complete and readable, and selection has not altered it.
- The input covers one defined scene and excludes unrelated files, thumbnails and held material.
- Important details have been reviewed at full size, with clear reasons for exclusions.
- The remaining sequence has been checked for continuity, including sides, rear views and occluded areas.
- Input extent, count and capture gaps are recorded, and the importer points to the working input folder.
Use the selected input folder for import and reconstruction in MakeWorlds Studio, then inspect the pavilion’s steps, sides and eaves against your checklist. If a problem remains, use the relevant filenames to revisit the originals and held material. Keep this input set and result so you have a clear comparison after adding new captures.