Practical guide · Capture and preparation
Photos or Video? Choosing Inputs for Your First Gaussian Reconstruction
Walk around the building before deciding how to capture it. Where can you stop, where can you move steadily and which details should the finished scene reveal? Those choices shape the material you bring into MakeWorlds Studio. This brick building guides the decisions from capture method to on-site checks and supplementary views.
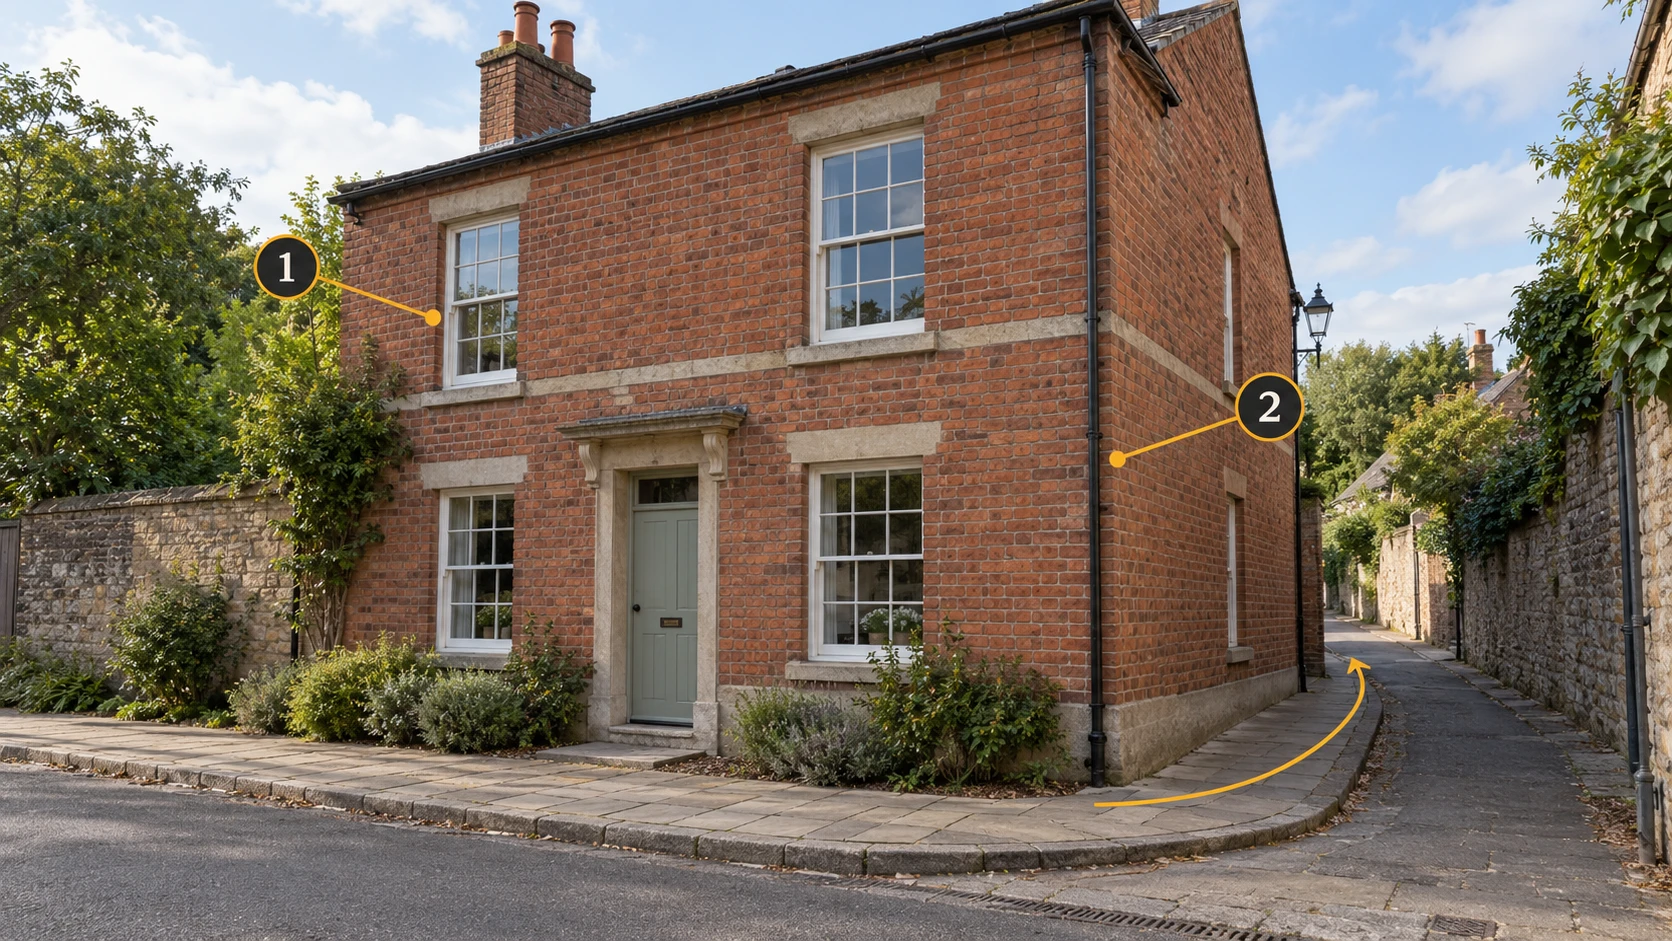
Define the intended viewing area first: only the front, or around the corner into the lane? List the entrance, windows and brickwork that viewers should inspect closely. Both capture methods need to cover those targets; duration and photo count alone do not establish coverage.
Choose for the conditions on site
| Situation | Start with | Check before committing |
|---|---|---|
| You can stop often and need close detail. | Still photos. | Inspect focus and retain context in close views. |
| A connected route allows steady movement. | Video. | Inspect moving sections and corners for clarity and framing. |
| A video exists, but details or side views are missing. | Additional photos or short clips. | Confirm supported inputs and keep additions organized. |
| Obstructions or changing light interrupt the capture. | Adjust the route or timing first. | Find visible, connected viewpoints. |
Check the files and route before the main capture
Try a short capture and check the files.
Take a few photos or a short clip first. Check that the originals open correctly, have the expected orientation and retain inspectable detail. If frames must be extracted from video, validate that step with the sample before capturing a long sequence.
Record the start, finish and planned stops.
Note the front, corner, lane and close-up stops in order. After an interruption, resume with content shared with the previous segment. Record the last clear position so you can identify any gap later.
Using photos: check each position before moving
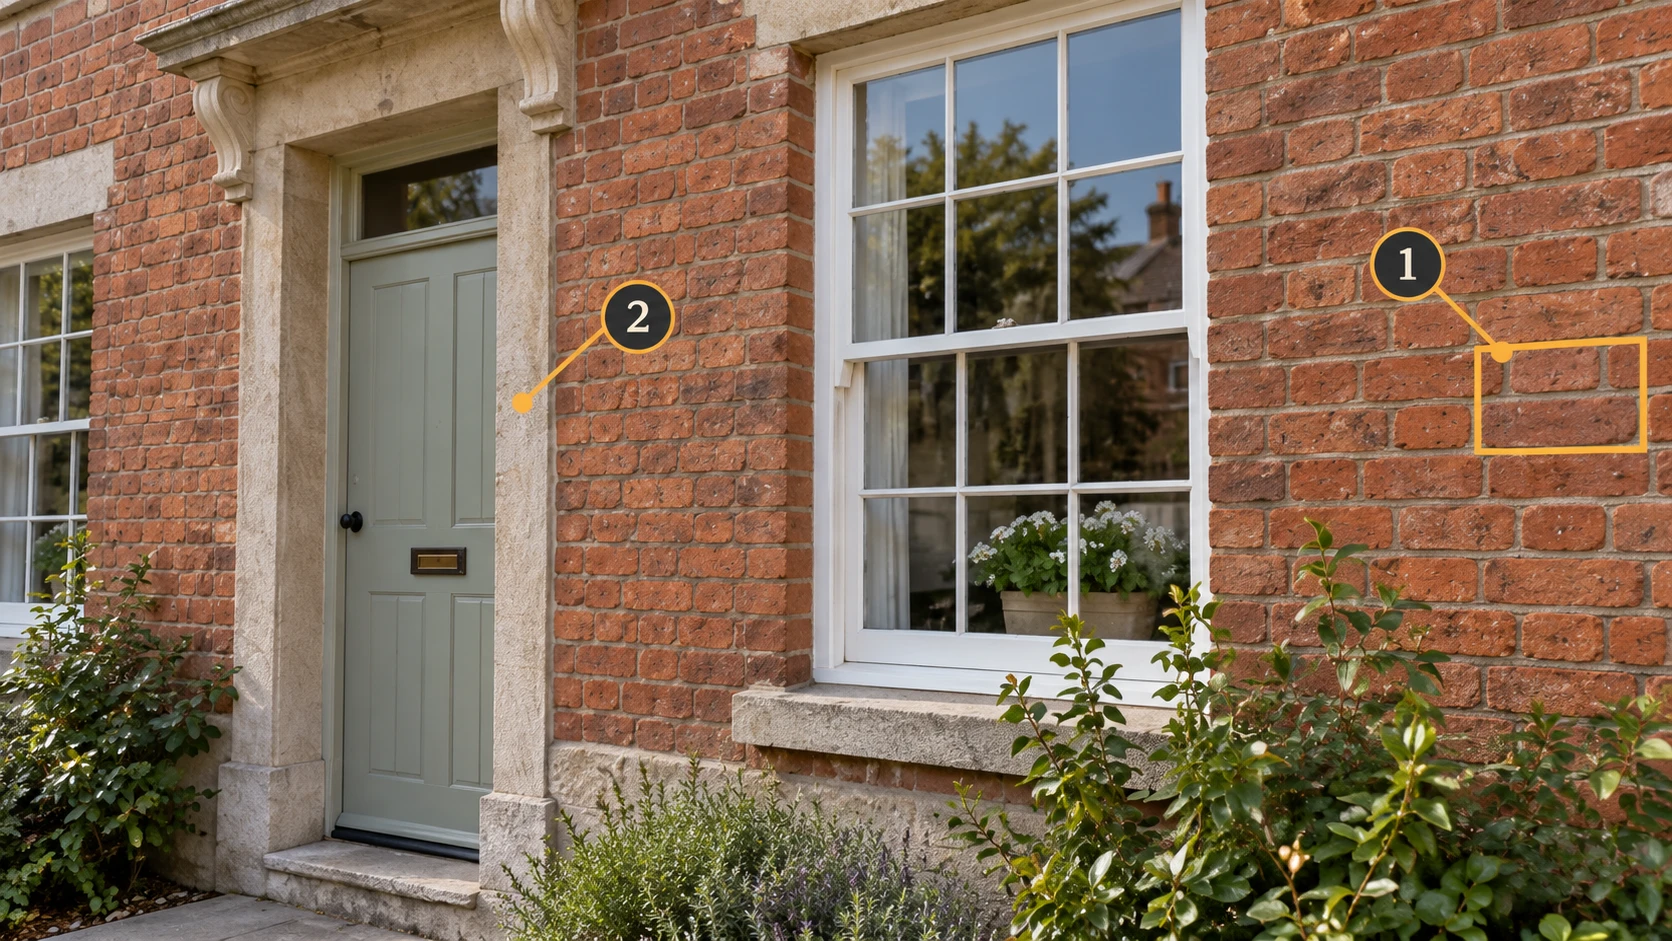
Start wide, then move closer.
Capture the facade from an overall viewpoint before approaching the windows. Retain recognizable content from the preceding shot as you move. Add intermediate views between an overview and a tight brickwork detail.
Inspect important details at full size.
Inspect mortar lines, window frames or a door handle at full size. A thumbnail can conceal missed focus or motion trails. Retake unclear views while you are still there, then inspect the adjacent shots too.
Check coverage between neighboring views.
Review photos in capture order and track shared landmarks. At the corner, include views showing both walls before moving farther along the side. Fill any missing interval between neighboring positions.
At the end of the sequence, you should be able to follow the route from front to side and find a clear view of each important detail.
Using video: keep the route connected and inspect the frames
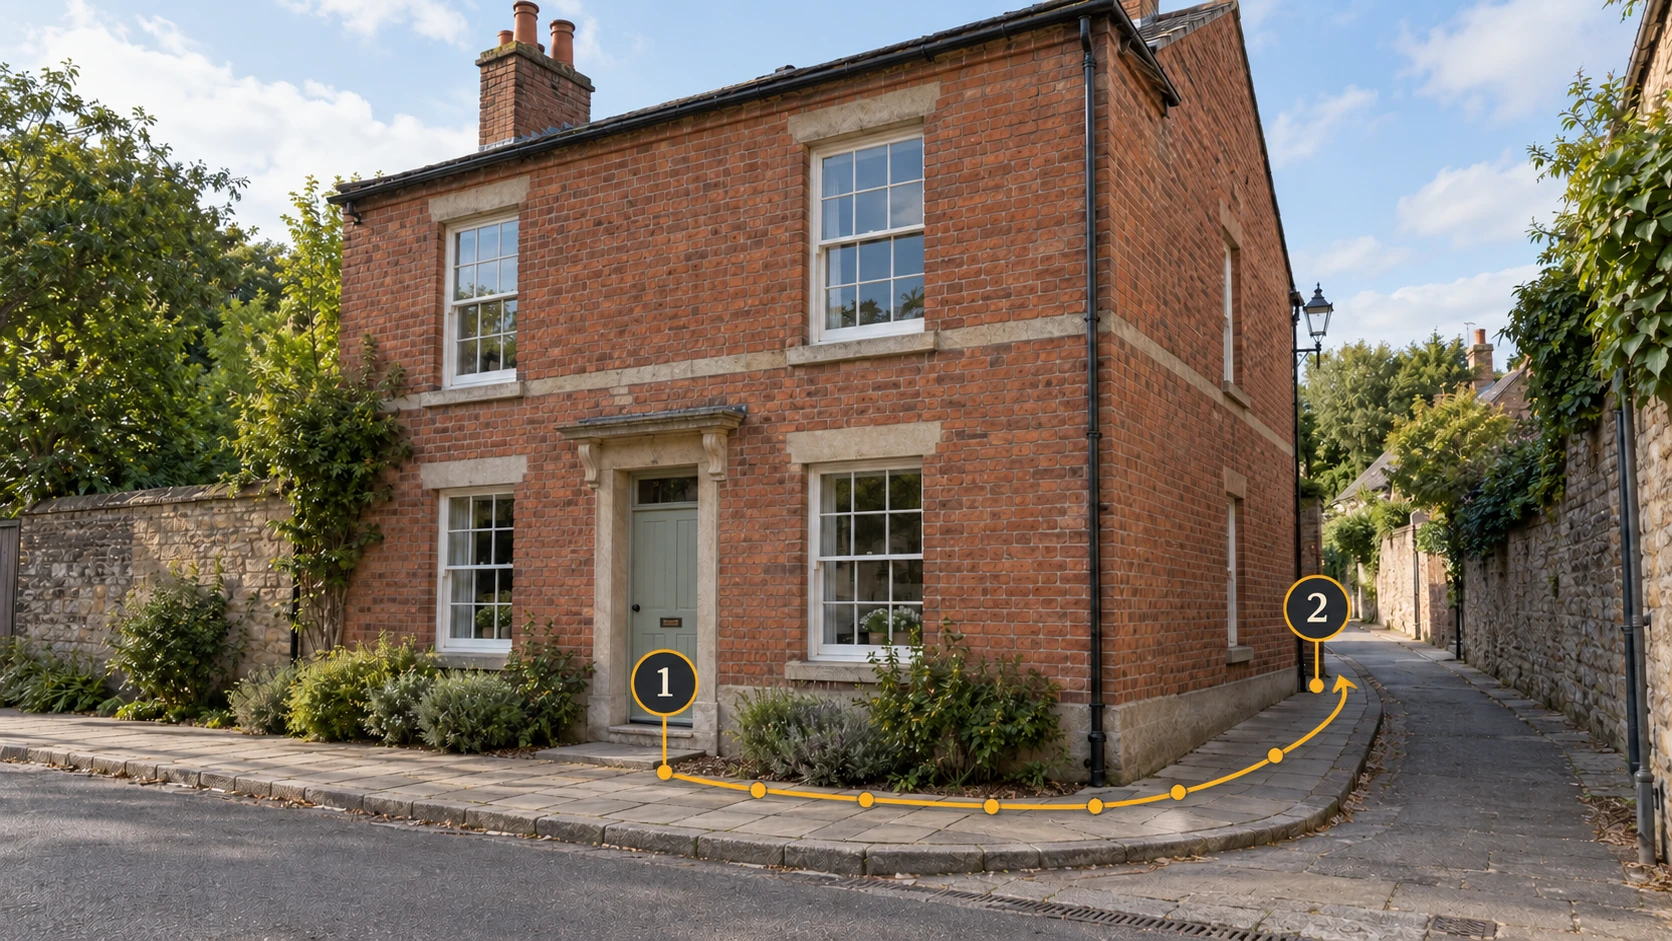
Walk the route before recording.
Identify corners, steps and stops before recording. Begin with an overall view, then follow the route while keeping the facade visible. Prepare for the turn into the lane instead of making a sudden change in direction.
Move steadily, especially around corners.
Watch for motion blur while moving; do not rely on a fast pan from one fixed spot. Slow down at turns and retain a window frame or corner from the preceding segment. After an interruption, resume from a view with shared landmarks.
Check playback and paused frames.
Review the beginning, middle, turns and end, then pause to inspect detail. Smooth playback does not mean every frame is usable. Note sections with blur, obstruction or abrupt exposure changes and recapture them on site.
Keep the camera’s original video. In MakeWorlds Studio, choose the input type that matches the material and validate import and reconstruction with a short clip before processing the full capture. If another tool is also involved, check whether it requires extracted frames and retain the original recording.
Connect additional detail to the wider capture
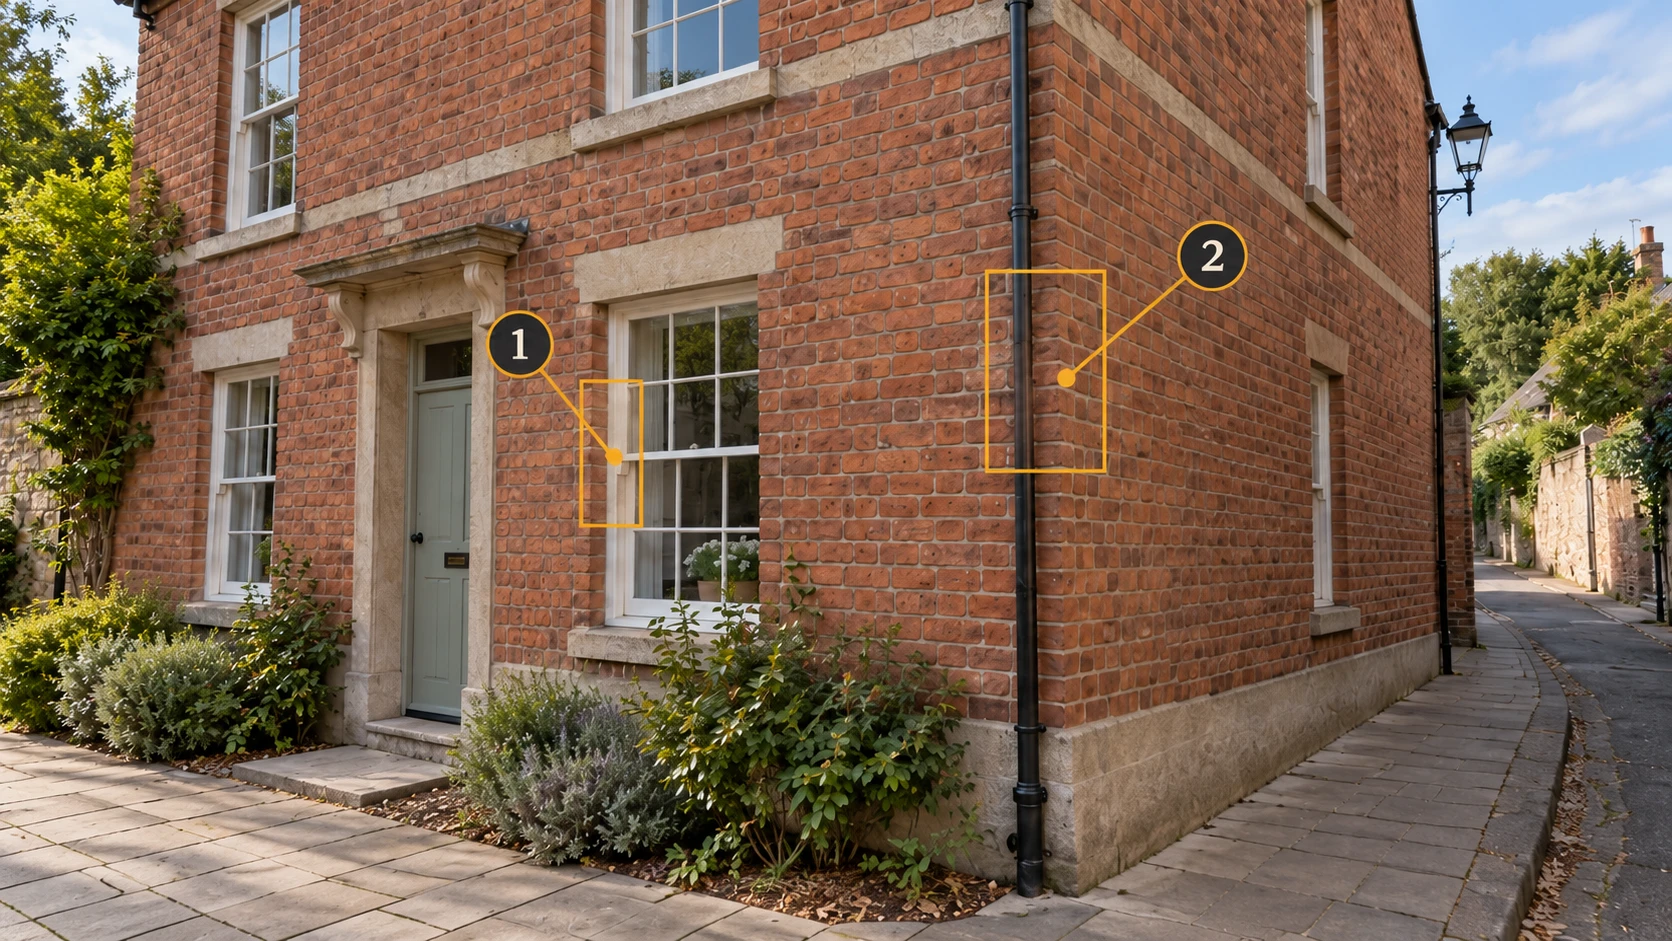
Identify the view that is missing.
Compare the material with the intended viewing area. Check recesses, corners and shaded entrances. Add a short sequence from an existing viewpoint toward the detail, rather than a single isolated close-up, and confirm how it connects to the overview.
Keep additional captures identifiable.
Keep objects, lighting and lens settings consistent where possible. Record changes in camera, lens or capture time as separate batches. Check supported input combinations before putting everything into a single processing folder.
Before leaving the location
- The material covers the overview and side views, including the intended turn.
- Key details are clear, and close views retain recognizable context.
- Neighboring sequences share landmarks, and additions connect to the original capture.
- Photos have been checked at full size; video has been inspected in motion and while paused.
- Original files are retained, with a record of the device, capture extent and unresolved areas.
Start in MakeWorlds Studio with one facade and a corner. Reconstruct that small area, follow the capture route through the scene and inspect the windows and side wall. Note any views that need supplementing before expanding. This gives your choice of photos or video a practical basis in your own material and viewing goals.