Practical guide · Capture and preparation
Capture the Whole Building: Overhead, Oblique and Supplementary Aerial Views
A complete-looking roof does not establish coverage of entrances, walls or covered walkways. Start with the viewpoints the finished scene must support, then plan overhead, oblique and supplementary observations. This L-shaped factory keeps the checks concrete.
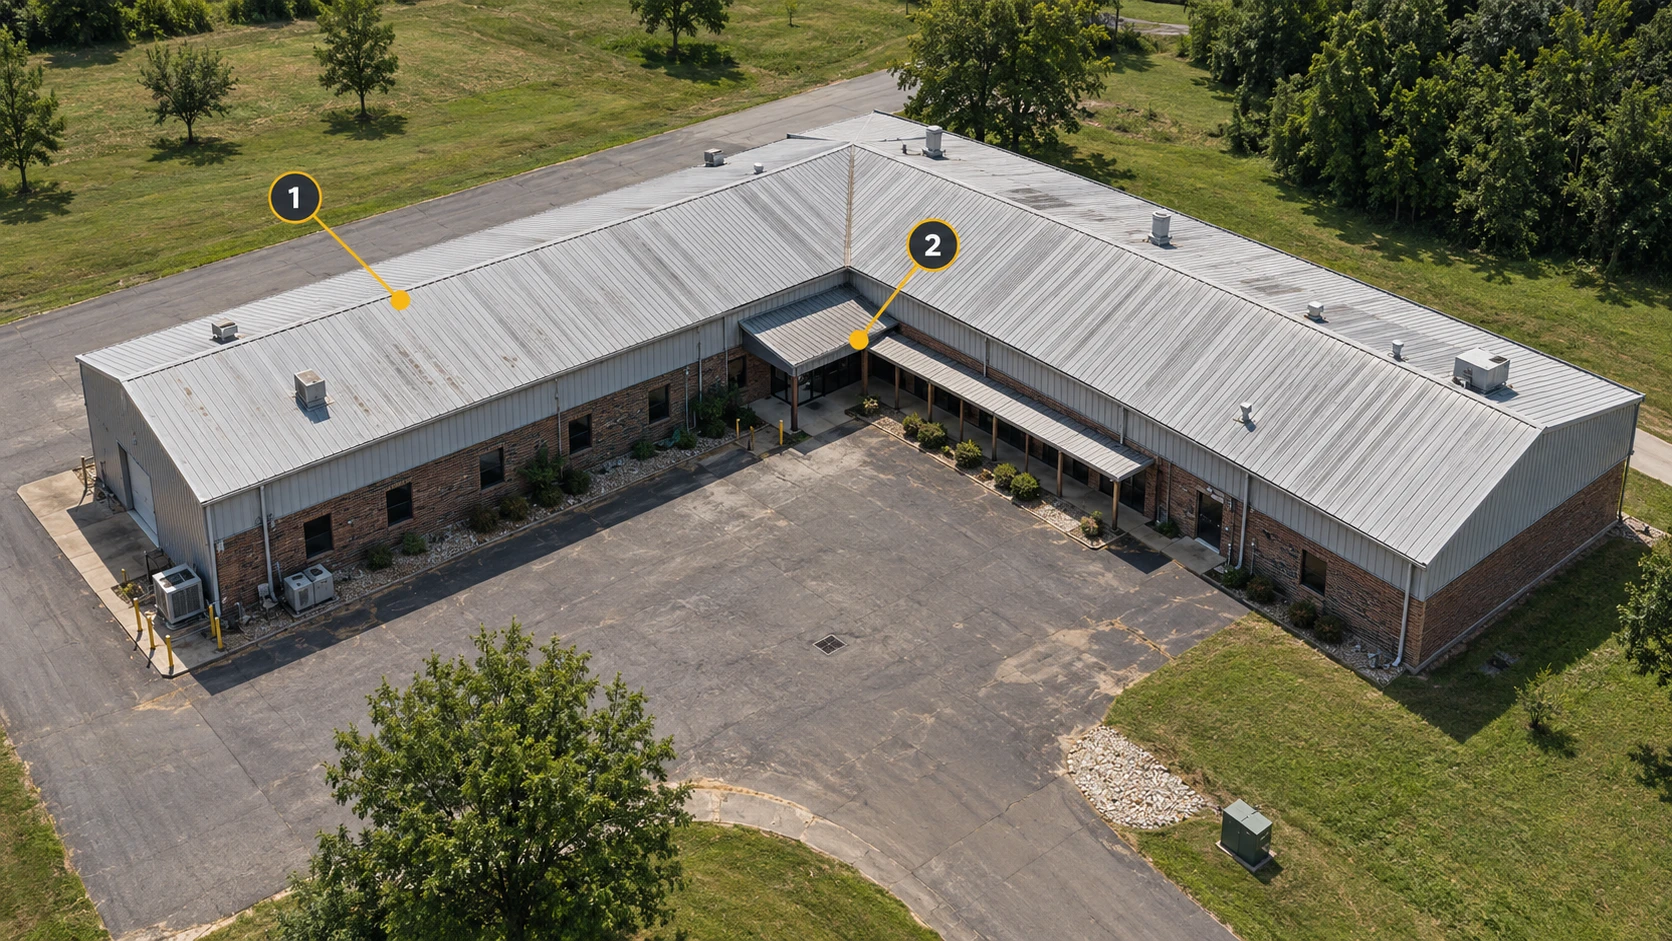
Picture how you intend to explore the factory in MakeWorlds Studio: an overview from above, a lower route along the walls or a closer look at the entrance. Turn those viewpoints into a roof, facade and occlusion capture checklist. Review it after each segment so the reconstructed scene has a clear inspection target.
Break the target into inspectable parts
Use building landmarks to record the scope.
List both wings, entrances, the inner corner, canopy and walkway. Record the required viewing direction and detail for each. State explicitly whether the task is an overhead overview or also a facade-level tour.
Identify surfaces hidden from overhead views.
Identify what trees, canopy roofs and covered walkways hide. Mark those areas for inspection from another direction or capture method. Record inaccessible surfaces rather than treating a complete outer silhouette as proof of coverage.
Overhead views: inspect the roof as one part of the building
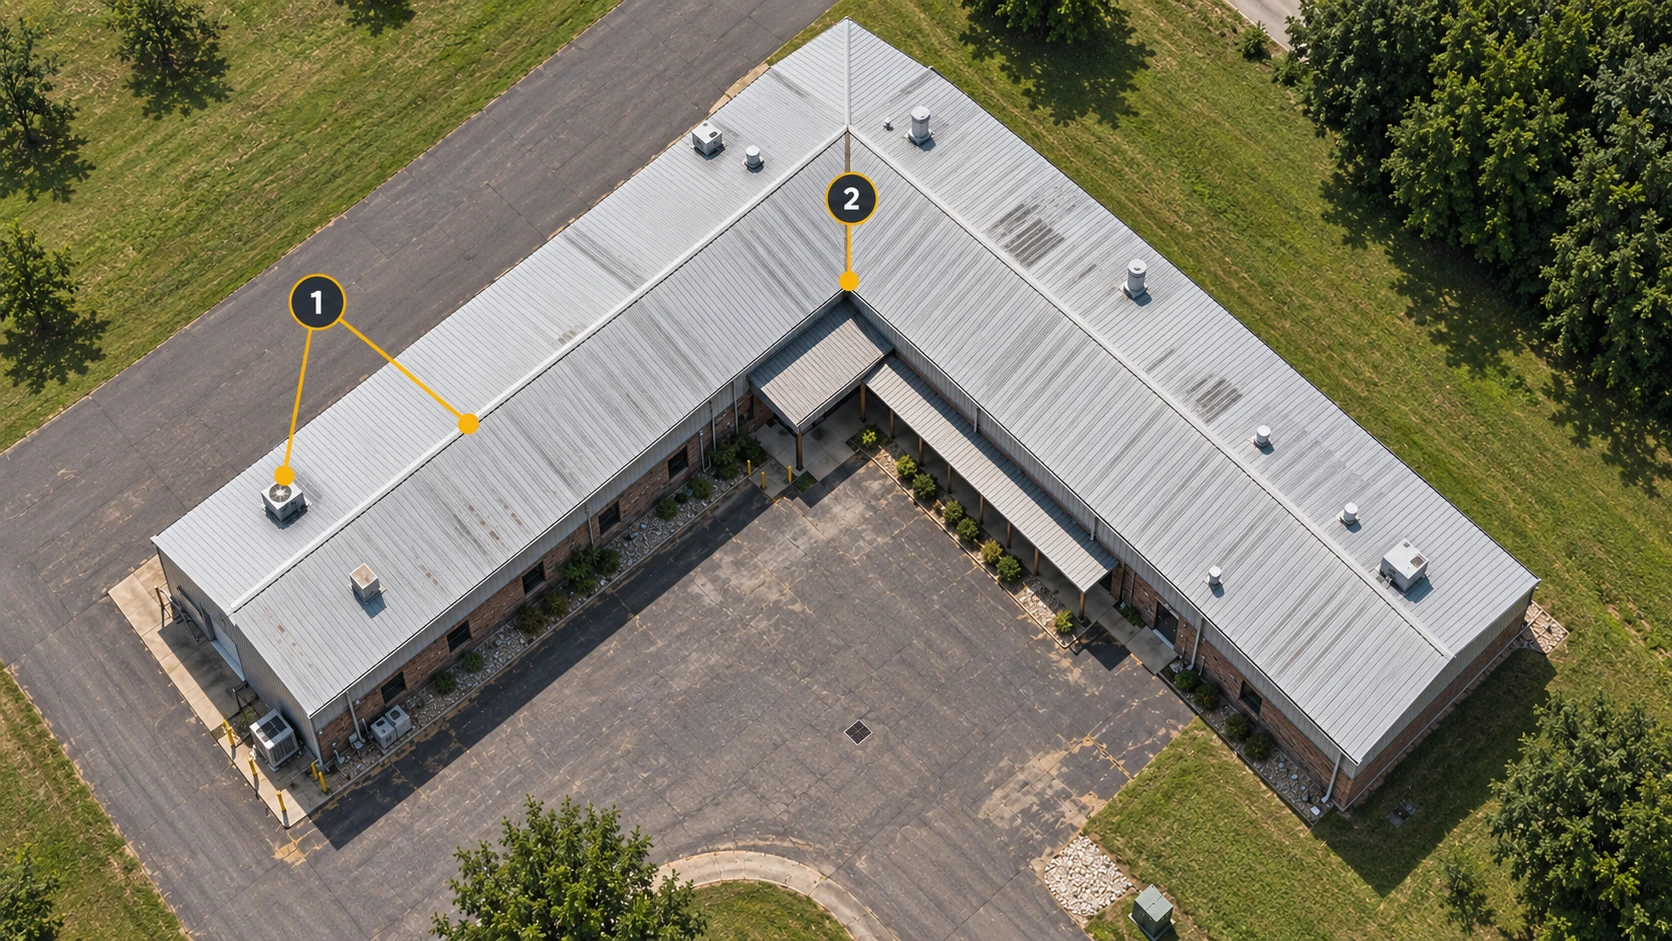
Check that the full building extent is covered.
Review both wings and locate the roof edges, inner junction and surrounding ground used for continuity. Add views where a wing only appears at the edge of a frame or is partially cut off.
Inspect ridges, seams and rooftop features.
Inspect several separated positions for clarity and roof texture. Check strong reflections, washed-out areas and equipment occlusions. A clear photo of the center does not verify the other wing.
Retain landmarks that connect to oblique views.
Identify roof edges, building corners or court features that will also appear in oblique views. Include intermediate observations where needed to connect the capture groups.
Oblique views: inspect facades and connect the corners
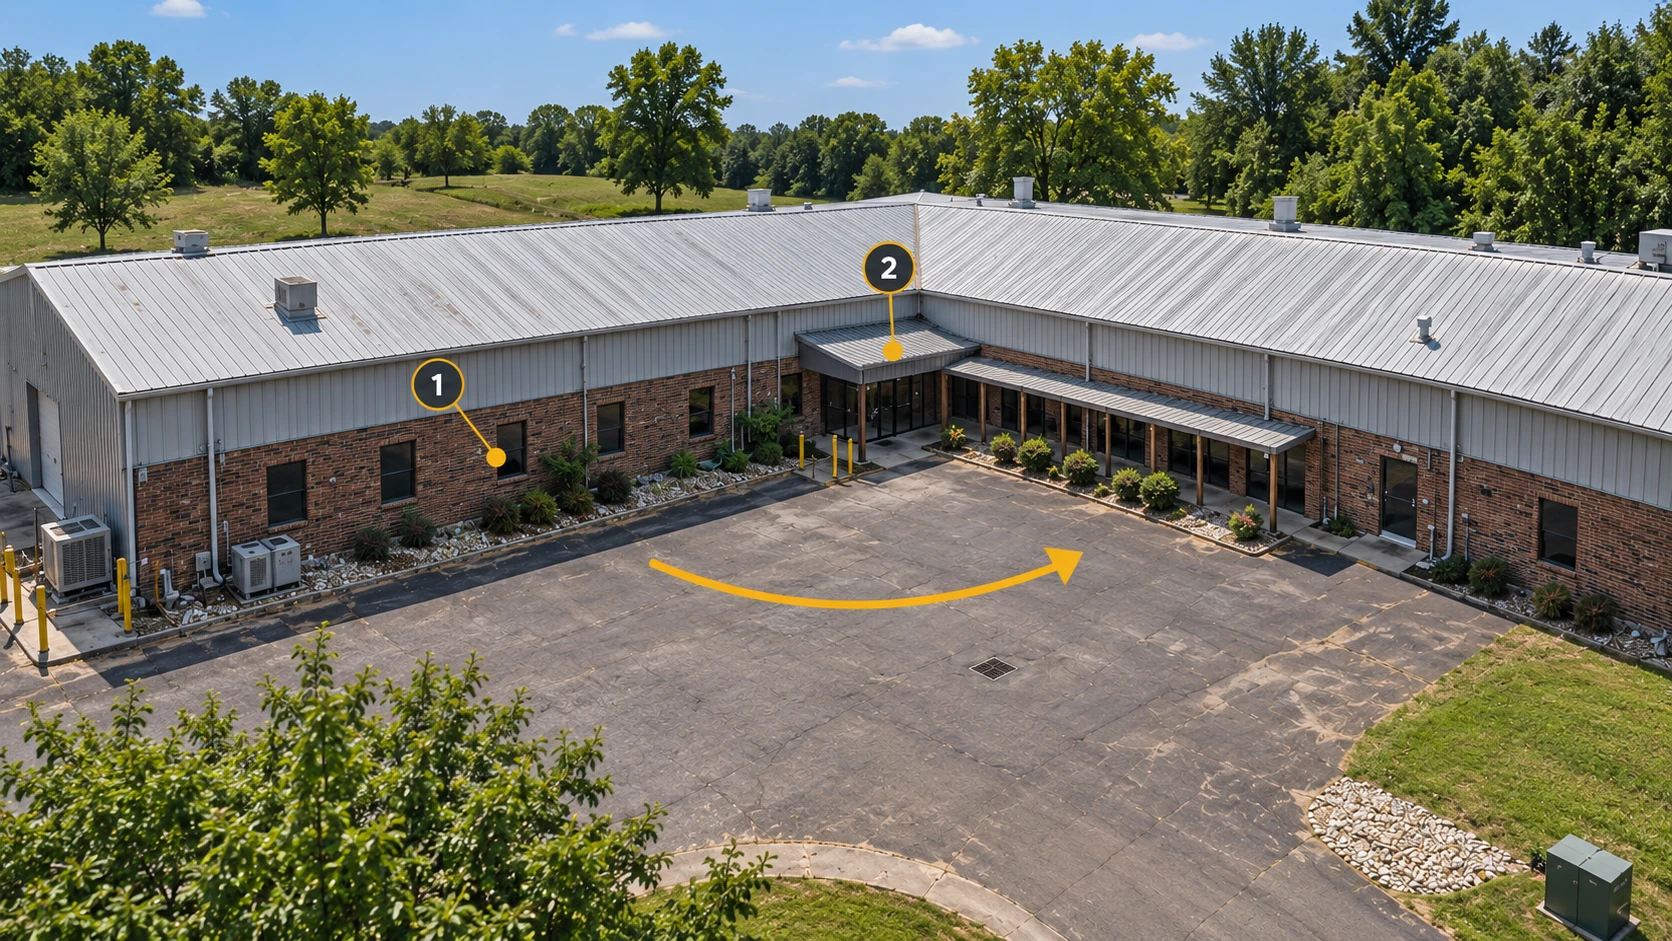
Check each facade independently.
For each facade in the viewing plan, look for clear windows, entrances and the base of the wall. A narrow strip beneath a dominant roof is not enough to establish close facade coverage. Check from viewpoints that reveal the required surface.
Include both faces at each corner.
Before moving to the other wing, include views of both walls with shared windows or corners. Inspect the inside junction separately for persistent occlusion, then review the sequence for a gradual transition.
Review each segment before moving on.
After a facade segment, inspect its beginning, corners and end for abrupt changes in clarity, exposure or coverage. Record windows hidden by trees and add views from positions where those surfaces become visible.
The illustrated direction organizes the inspection sequence. Select real capture positions for the site; fixed flight settings do not replace checking the images of each facade.
Supplement the views beneath canopies and behind posts
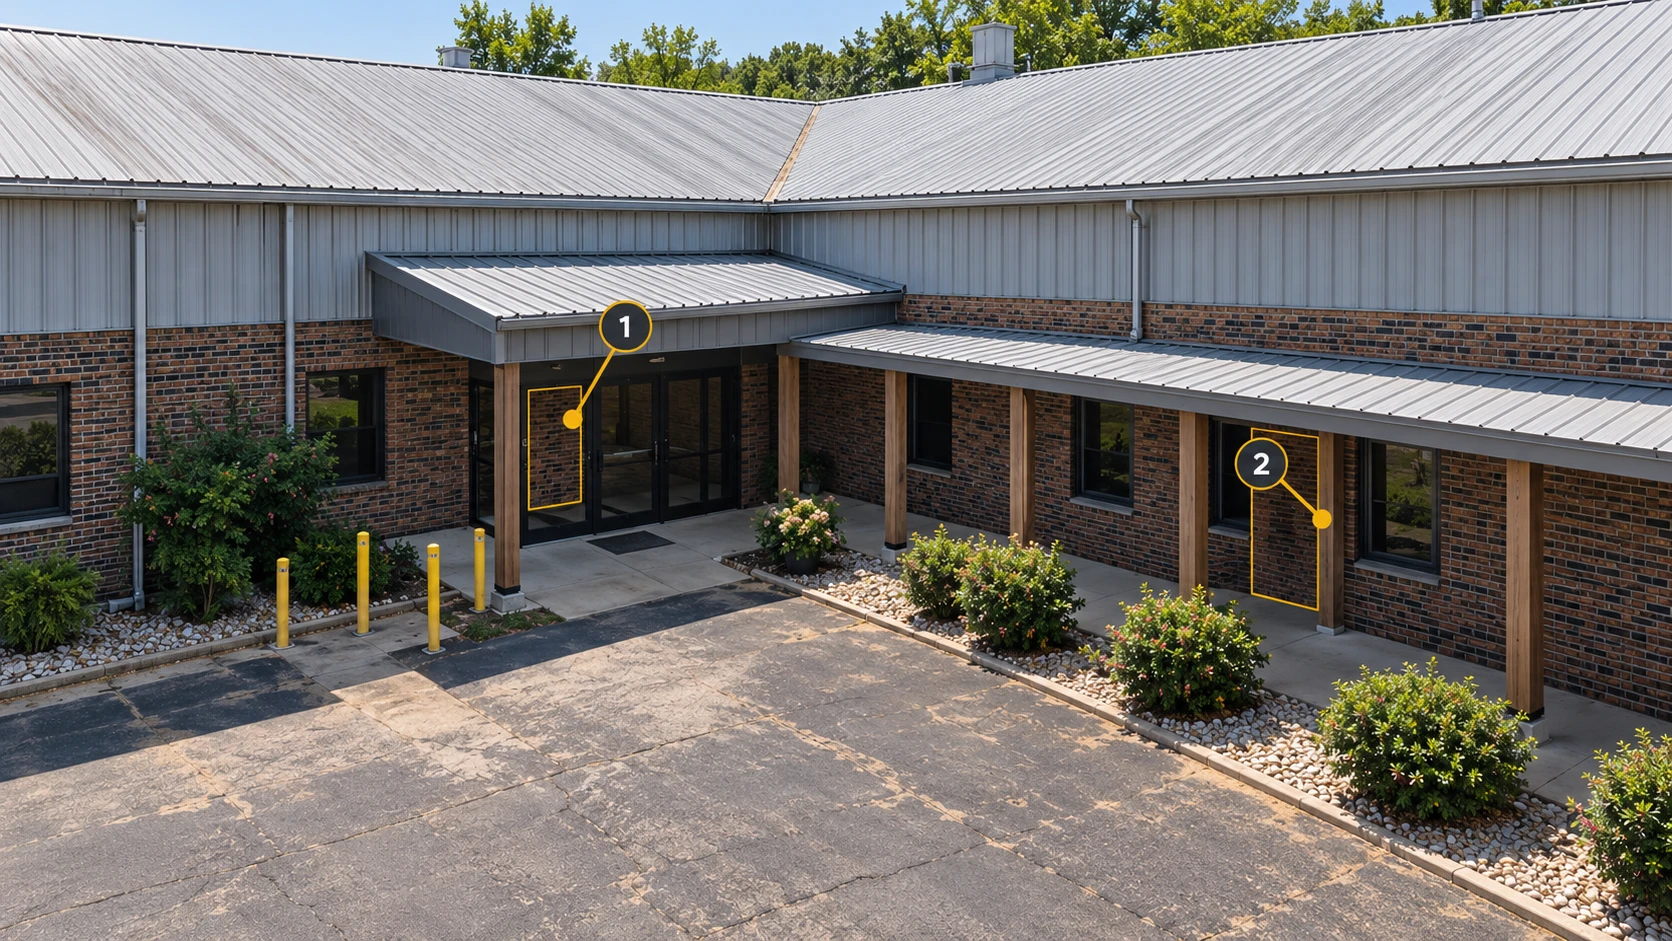
Look for the actual surface in existing photos.
For a wall beneath the canopy, find photos that show the wall rather than only the canopy roof. Check behind walkway posts and inside recesses. An overall view of the walkway does not expose every surface beneath it.
Add observations from positions that reveal the target.
Find an unobstructed position with a clear view, then add neighboring observations. Consider ground-level or other suitable capture methods where appropriate; supplementing coverage does not require flying into confined covered spaces.
Include recognizable context in the added views.
Keep a nearby doorframe, post or corner in detail views so they connect with the existing material. Maintain consistent scene conditions where possible. Record a different device as a separate batch and confirm how the processing tools support it.
Check each part of the building before leaving
| Building part | What to look for | If coverage is incomplete |
|---|---|---|
| Roofs and wing junction | Clear views of edges, ridges and major fixtures. | Add views of incomplete edges and occlusions. |
| Walls, windows and wall bases | Inspectable views of each required facade. | Capture from positions that reveal the facade. |
| Outside and inside corners | Shared features connect neighboring segments. | Add intermediate views showing both faces. |
| Under canopies and walkways | The intended walls and areas behind posts are visible. | Find unobstructed viewpoints or add ground-level capture. |
Record unresolved items before ending the capture
- Review the intended route and locate the overall, facade and required detail views.
- Confirm shared features between segments and connections to supplementary captures.
- Inspect original image clarity and exposure rather than relying on thumbnails.
- Record remaining occlusions or inaccessible areas and their effect on the viewing scope.
- Retain the original batches and note capture extent and device changes before organizing them.
Bring the material for one wing, a corner and the entrance into MakeWorlds Studio as a first sample. After reconstruction, move from the roof overview down along the facade to the entrance and inspect the surfaces on your checklist. Validate that route before processing the whole building, using specific scene locations to trace any remaining gaps back to the source material.